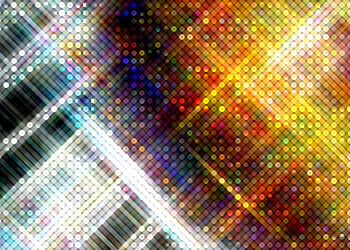
Digital Star Effect Photoshop Tutorial
http://photoshoptutorials.ws/photoshop-tutorials/photo-effects/digital-star-effect.html1. 適当な写真開く
2. レイヤー複製 Ctrl+J
3. 複製したレイヤーにFilter> Pixelate> Mosaic) with a Cell Size of 8 square
4. Filter> Stylize> Find Edges) フィルタ 表現手法 > 輪郭検出フィルタ > ノイズ 明るさの中間値 Median with a Radius of 2 pixels
5. Filter> Other> Maximum) Use a Radius of 1 pixel
6. Ctrl+I
7. 複製したレイヤーを複製 最上段にしてスクリーン
8. Filter> Stylize> Find Edges) フィルタ 表現手法 > 輪郭検出
9. Ctrl+I
10. 複製したレイヤーを複製したレイヤーを2枚複製
11. 最上段を Filter> Blur> Motion Blur) ぼかし ぼかし(移動) 45度 100 pixels.
12. Shift+Ctrl+L
13. 上から二つ目のレイヤーを(Layer 1 copy 2)をぼかし > ぼかし(移動) -45度 100 pixels.
14. Shift+Ctrl+L
15. 最上段にLayer> New Adjustment Layer> Brightness/Contrast 調整レイヤー 明るさ/コントラスト
16. 好きなようにして終わり